Get to know all of the exciting new updates to your marketplace and dashboard! Learn more about a better checkout experience, the new app store, better reporting and more!
We’ve made a lot of great new updates to your marketplace! This article will walk you through all the improvements to help you navigate your marketplace and get the most out of your SamCart experience. Please note that this walkthrough is for our new and improved user experience. If your marketplace is still on the previous UI, you can try out all the updates by clicking on the Upgrade Experience button inside the left-hand navigation.
To highlight a few key navigation points as you explore your marketplace
- The Courses App and Customer Hub live in the App Marketplace section of the navigation bar
- We have improved your left hand menu so finding your data and reports is more intuitive.
- The Checkout Share tab in your product settings gives you easier access to Checkout Anywhere experiences and design options.
- Quick Actions help process refunds, cancellations, or new orders faster than ever. Order and subscription management actions can now be easily accessed through Quick Actions.
- The Content Builder can be accessed inside your product by clicking the Sales Page tab
Continue reading for additional information on these updates and learn about some of the other exciting additions to your marketplace! This article will walk through updates related to:
- New Navigation Bar Options
- Checkout Anywhere / Product Settings
- Brand Settings
- App Store
- Updated Reports
New Navigation Bar Options
Hovering over on the left hand side of your marketplace will bring up the full navigation bar, that allows you to navigate through your entire marketplace. With the new updates, you might notice some changes with the Navigation Bar options. This is to help streamline your experience and take less clicks to use your most powerful tools!
The first difference is that the Courses tab has been removed. You can find the Courses tool by navigating to the Apps tab. Since Courses is an app that was created here at SamCart, it now lives in our App Marketplace! Scroll down to the App Marketplace section for more information on Apps.
The Audience tab has been updated to the Customers tab. You can still find all the same valuable information about your customers in this tab, now with improved search capabilities! For more information on the Customers report, scroll down to the Customers Report section in this article.
You can now effortlessly access your orders and subscriptions report right from the Navigation bar! Just click on Orders or Subscriptions to take you to the designated area. These reports have also gotten improved to streamline your customer management. Learn more about it in the Orders or Subscriptions Report section of this article!
The Marketing tab (previously the Tools tab) is where you can access your Cart Abandonment, Affiliate Center, and Subscription Saver tools.
Checkout Anywhere / Product Settings
After taking into account all of the feedback from our user base, we are ready to feature Checkout Anywhere front and center! To accomplish this we have rearranged the product settings tabs so that Checkout Anywhere is more easily accessed.
To start, we will first take a look at an update made on the Product tab’s quick actions.
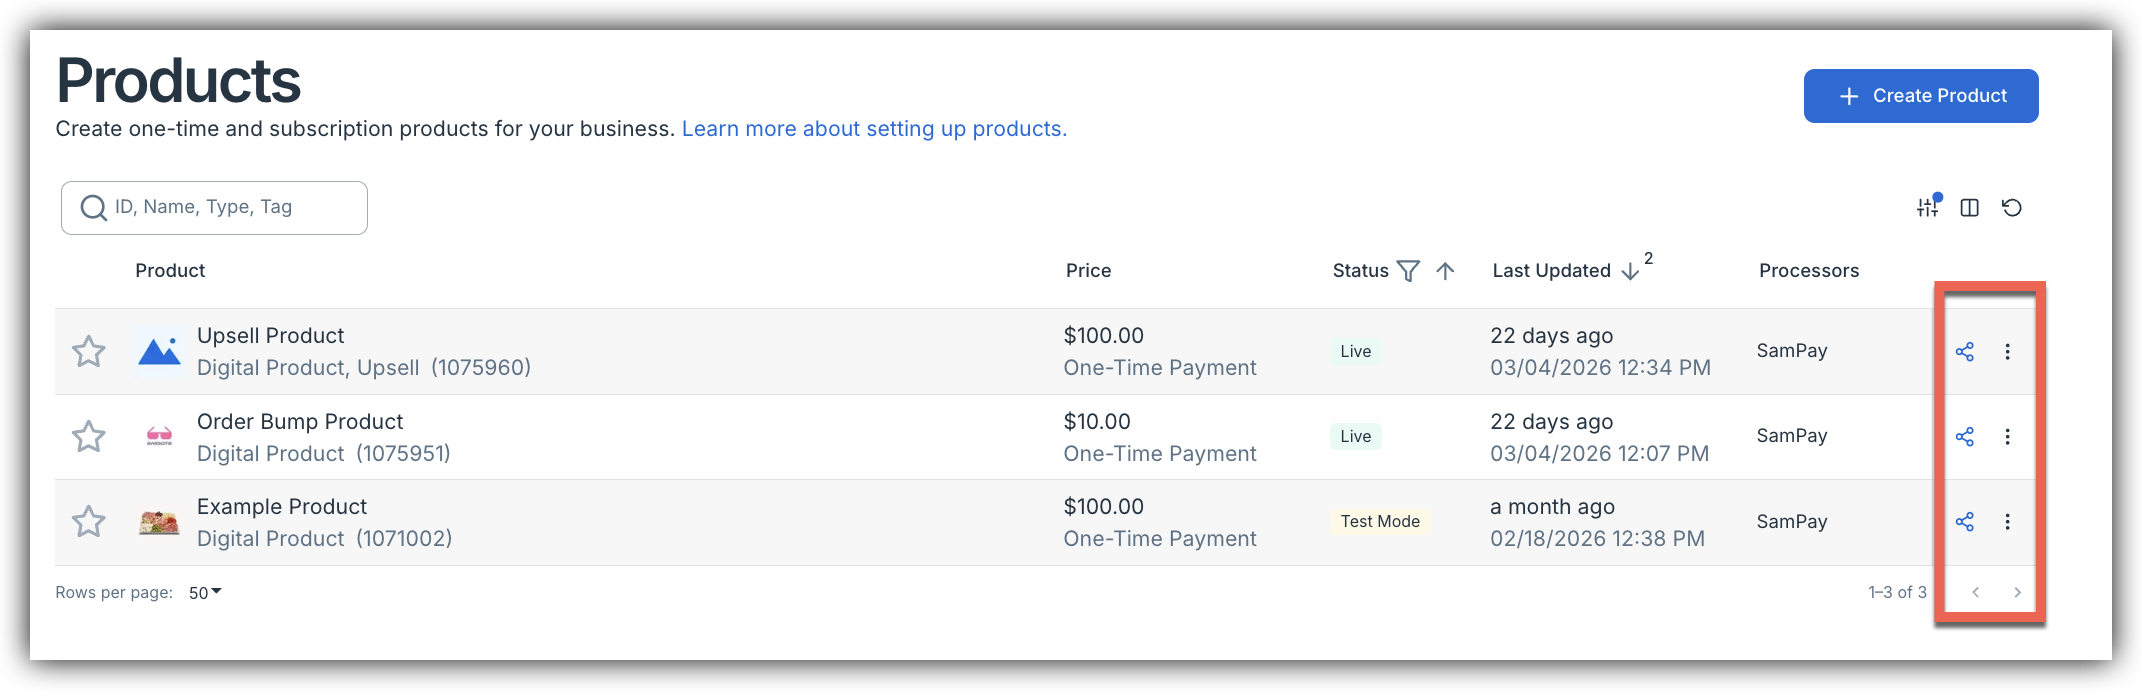
The quick action Share button will display three share options.Express, Embed and Slide.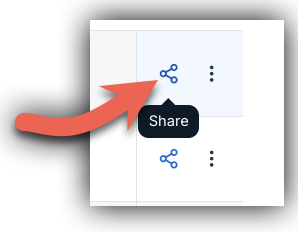
This gives you the option to quickly copy and paste the express checkout link and start making sales! Or the Embed or Slide code easily into your webpage for use.
Next, we will check out the improvements made inside an existing product's settings. Inside any of your products you will see some of our new UI for product settings. On the top of the page you will see two tabs: Settings and Share.

The Settings section of your product shows all your original product specific tabs, such as Product Details, Digital, Payments, Offers, Emails, Apps, etc.

The biggest difference here is that there is no longer a Checkout Anywhere or Design tab inside the product specific settings. These settings are now inside the Share tab!
The Share tab takes you to manage your sales page settings, which will include Design and Checkout Anywhere options. By default, the Share tab will take you to the Express Checkout settings.

For more information on Express and Embed Checkout, please visit the following knowledge base articles:
To access the content builder for sales pages, click on the Sales Page tab. There you can build out full sales pages. For more information on the Content Builder and building sales pages, visit our Content Builder knowledge base article.
Important Note: If you have not connected a payment processor, or are only connected to PayPal, Braintree, Auth.net, EasyPay Direct the Embed and Express options will be locked and you will see a “Your processor is not currently supported for Express/Embed”. For a guide on how to connect with a processor please checkout our Connecting Payment Processors article.
Checkout Anywhere (Embed/Express) is only supported on Stripe and SamPay. For more information on Checkout Anywhere requirements please visit our Checkout Anywhere article.
Checkout Anywhere Brand Settings
We received a lot of feedback since releasing Checkout Anywhere about customization, and we are pleased to announce that we can now add brand settings to your Express or Embed pages on either the global or product level!
Your General Marketplace settings also got a UI update and some additional tabs!Inside your General Marketplace settings you will now see a Branding tab.
On the Branding page you will be able to customize your themes and settings that will by default apply to all your embed and express experiences.
You can override these global settings on the product level! To do so, navigate inside your product and click on the Share tab. On either the Express or Embed tab, you can use the Override Branding Theme toggle to open up fields to create unique settings for that specific product.

For more information on Checkout Anywhere Branding, visit our Branding support article for more information as well as a step by step guide!
App Marketplace
To bring you a more user friendly experience to connect third party tools to your marketplace we are excited to introduce the new App Marketplace (previously the Integration Engine).
To locate your App Marketplace, click on the Apps button inside the navigation menu on the left hand side.

Here you will be able to connect and manage third party applications!
On the Marketplace Tab of the Apps section you can browse through all our native apps or search for an app with the search bar.
The App Marketplace is now also home to apps and tools that have been created by SamCart that used to exist in different locations! These include:
- Customer Portal (formally known as Customer Hub)
SamCart Courses (previously located in the navigation bar)
Clicking on the Installed tab will show you all your connected apps.

Clicking inside a connected app will open up settings for that specific integration. There you can create and manage rules, edit which products rules are applied to, and check out configuration and action logs.

For more information and step by step guides on using the App Marketplace, please visit our App Marketplace Knowledge Base article.
Updated Report Pages
The Orders, Subscriptions, and Customers (previously known as Audience) Pages have all been updated with a fresh new UI, along with exciting new quick actions and helpful columns to allow you to manage your subscriptions and orders with ease. Feedback from you, our valued users, helped us create these pages with a cohesive and smooth experience when managing your customer’s orders, subscriptions, and data!
Within all three of these reports, your page will start with three data cards unique to that page at the top of the screen. This allows you to have a quick glance at your data for that given report. All three updated reports' cards will show data by default for the last thirty days.

You can adjust the range of data by clicking in the Last 30 Days drop down.

On all of the update report pages, you can click on the subscription data cards to see how the data is measured for that specific value.
 Underneath the data cards, you will see more valuable information about your subscriptions, orders, or users at a glance. For all the updated reports, you can scroll to the right on the table to see additional information.
If you’d like to edit the width of the columns for any of these reports for better visibility - you now can! To do so, just hover over the column title and when you see the column adjuster click and drag to the appropriate width.

Additionally, we have made an exciting update to the Subscriptions and Orders pages that will allow for quick actions such as cancel subscription, update card, etc. directly from the Orders or Subscriptions page. This lets you quickly manage orders and subscriptions without having to navigate away from the page.
Read on to learn more about specific changes to the different reports below!
Subscription Report
To locate the updated Subscription Report, click on the Subscription button inside the navigation bar.
The Subscription tab in the navigation bar previously included both the Subscription Activity and Reports tab. The Reports page that was previously in the Subscription tab can now be found in Analytics.

On the Subscription page you can now at a glance see high-level data for your Subscription Revenue, Churned Subscriptions, and Trial Conversion Rate. By default, the report will show data for the Last 30 days.
Underneath the data cards, you can now quickly see:
- Subscription ID
- Customer name and email
- Subscription Status - active, canceled, or completed (for limited subscriptions)
- Subscription Type - the type of subscription was purchased (Limited or Recurring)
- Number of rebills - Remaining rebills in a limited subscription (a recurring subscription will show 0)
- Rebill amount
- Payment type - credit card, PayPal, Klarna, etc
- Subscription Created Date
- Next Rebill Date
- Balance - amount remaining to be collected in a limited subscription
- Order ID - Hyperlinked to route you to the customers order page.
- Collected - total amount of funds gained from a subscription
One of the most exciting updates is the ability to quickly manage your subscriptions without having to click inside the actual order and bringing up additional pop-up windows.
On your subscription report, you will now notice three dots at the far right of every row. Clicking on that icon will bring up quick actions relevant to that order.

There are different groups of quick actions you will be shown depending on the Status of the subscription.
If a subscription is canceled or completed you will see the following options:

If a subscription is active you will see the following options:

The Cancel Subscription option will open a pop-up with all our current cancellation options (silent cancellation, scheduled cancellation, immediate cancellation).
Note: The Payoff Subscription option will only be available on active limited subscriptions.
For more information on what the different actions are and subscription management, please visit our Managing and Editing Subscription knowledge base article.
Another new update is there is now a unique Subscription page for your customers, just like there is a full details order page for customers! You can navigate to the full subscription details page by clicking on the Subscription ID.
There you will be able to see additional information, such as billing details, failed charge logs, and more! Additionally, you’ll have more actions outside of the quick actions such as Edit next billing date in the Billing Information section.

Orders Report
To locate the updated Orders Report, click on the Orders tab inside the navigation bar.

On the Orders page you can now at a glance see the data for Total Orders, Conversion Rate and Refunds. By default, the report will show data for the Last 30 days.
Underneath the data cards, you can now quickly see:
- Order ID - clicking on the hyperlinked order ID will take you to view full details of a customer order with additional information and actions for order management.
- Customer
- Status - charged or refunded
- Payment Method - Credit Card, PayPal, Klarna, etc.
- Mode - live vs test mode
- Order Date
- Product
- Number of Items
- Coupons
- Order Total
On your Orders report, you will now notice three dots at the far right of every row. Clicking on that icon will bring up quick actions relevant to that order. Similar to the subscription report you will be able to quickly refund and cancel orders.
Customers Report
To locate the Customers Report (previously known as Audience), click on the Customers tab inside the navigation bar.

On the Customers page you can now at a glance see the data for Customers, Repeat Customers, and Lifetime Value. By default, the report will show data for the Last 30 days for customers and repeat customers, however Lifetime Value is a gross data value and is not affected by the date picker.
Underneath the data cards, you can now quickly see:
- Name and Email - clicking on the hyperlinked name will take you to view full details of a customer with additional information and actions for customer management.
- Customer ID - unique customer identifier
- Phone
- Lifetime Value
- Created Date - initial charge date
- Last Charge
If you utilize tags for products, you can add a Tag column by clicking on the Columns icon. You can also add in additional information as well!

Just toggle on the desired column to add it to your report!
We appreciate your feedback that helped us create and build all these exciting new features and updates! If you have any additional feedback or questions, reach out to support@samcart.com and we are happy to help!